G.PULLAIAH COLLEGE OF ENGINEERING & TECHNOLOGY KURNOOL
SUB: WEB TECHNOLOGIES (R09)
UNIT-3
Important Points about PHP:
PHP stands for PHP: Hypertext Preprocessor
PHP is a server-side scripting language that is embedded in HTML. It is used to manage dynamic content, databases, session tracking, even build entire e-commerce sites, like ASP
PHP scripts are executed on the server
PHP supports many databases (MySQL, Informix, Oracle, Sybase, Solid, PostgreSQL, Generic ODBC, etc.)
PHP is an open source software
PHP is free to download and use
PHP supports a large number of major protocols such as POP3, IMAP, and LDAP. PHP4 added support for Java and distributed object architectures (COM and CORBA), making n-tier development a possibility for the first time.
What exactly PHP:
ü PHP files can contain text, HTML tags and scripts.
ü PHP files are returned to the browser as plain HTML
ü PHP files have a file extension of ".php", ".php3", or ".phtml"
ü PHP runs on different platforms (Windows, Linux, Unix, etc.)
ü PHP is compatible with almost all servers used today (Apache, IIS, etc.)
ü PHP is case sensitive
Common uses of PHP:
· PHP performs system functions, i.e. from files on a system it can create, open, read, write, and close them.
· PHP can handle forms, i.e. gather data from files, save data to a file, thru email you can send data, return data to the user.
· You add, delete, and modify elements within your database thru PHP.
· Access cookies variables and set cookies.
· Using PHP, you can restrict users to access some pages of your website.
· It can encrypt data.
Characteristics of PHP
Five important characteristics make PHP's practical nature possible:
1. Simplicity
2. Efficiency
3. Security
4. Flexibility
5. Familiarity
PHP Installation:
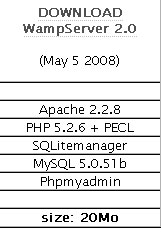
ü Download PHP for free here: http://www.php.net/downloads.php
PHP Environment Setup
In order to develop and run PHP Web pages three vital components need to be installed on your computer system.
Web Server - PHP will work with virtually all Web Server software, including Microsoft's Internet Information Server (IIS) but then most often used is freely availble Apache Server. Download Apache for free here: http://httpd.apache.org/download.cgi
Database - PHP will work with virtually all database software, including Oracle and Sybase but most commonly used is freely available MySQL database. Download MySQL for free here: http://www.mysql.com/downloads/index.html
PHP Parser - In order to process PHP script instructions a parser must be installed to generate HTML output that can be sent to the Web Browser.
Apache Configuration for PHP
Apache uses httpd.conf file for global settings, and the .htaccess file for per-directory access settings. Older versions of Apache split up httpd.conf into three files (access.conf, httpd.conf, and srm.conf), and some users still prefer this arrangement.
Apache server has a very powerful, but slightly complex, configuration system of its own. Learn more about it at the Apache Web site: www.apache.org
The following section describe settings in httpd.conf that affect PHP directly and cannot be set elsewhere. If you have standard installation then httpd.conf will be found at /etc/httpd/conf:
Timeout
This value sets the default number of seconds before any HTTP request will time out. If you set PHP's max_execution_time to longer than this value, PHP will keep grinding away but the user may see a 404 error. In safe mode, this value will be ignored; you must use the timeout value in php.ini instead
DocumentRoot
DocumentRoot designates the root directory for all HTTP processes on that server. It looks something like this on Unix:
| DocumentRoot ./usr/local/apache_1.3.6/htdocs. |
You can choose any directory as document root.
AddType
The PHP MIME type needs to be set here for PHP files to be parsed. Remember that you can associate any file extension with PHP like .php3, .php5 or .htm.
| AddType application/x-httpd-php .php AddType application/x-httpd-phps .phps AddType application/x-httpd-php3 .php3 .phtml AddType application/x-httpd-php .html |
Action
You must uncomment this line for the Windows apxs module version of Apache with shared object support:
| LoadModule php4_module modules/php4apache.dll |
or on Unix flavors:
| LoadModule php4_module modules/mod_php.so |
AddModule
You must uncomment this line for the static module version of Apache.
| AddModule mod_php4.c |
PHP Syntax:
Note:
PHP code is executed on the server, and the plain HTML result is sent to the browser.
A PHP scripting block always starts with <?php and ends with ?>. A PHP scripting block can be placed anywhere in the document.
Each code line in PHP must end with a semicolon. The semicolon is a separator and is used to distinguish one set of instructions from another.
There are two basic statements to output text with PHP: echo and print
The file must have a .php extension
PHP tags can be represented in 4 ways
1. Canonical PHP tags:
Eg: <?php...... ?>
2. Short-open (SGML-style) tags:
Eg: <?...?>
3. ASP-style tags:
Eg: <%...%>
4. HTML script tags:
Eg : <script language="PHP">...</script>
Comment Lines in PHP:
Note: Comment lines are used in the program to understand the code
There are two commenting formats in PHP:
- Single-line comments(# or //)
- Multi-lines comments(/*----*/)
PHP Variables:
A variable is used to store information.
Variables are used for storing values, like text strings, numbers or arrays.
When a variable is declared, it can be used over and over again in your script.
All variables in PHP start with a $ sign symbol.
The correct way of declaring a variable in PHP: Eg: $var_name = value;
Eg: creating a variable containing a string, and a variable containing a number:
<?php |
PHP is a Loosely Typed Language:
In PHP, a variable does not need to be declared before adding a value to it.
you do not have to tell PHP which data type the variable is
PHP automatically converts the variable to the correct data type, depending on its value.
Naming Rules for Variables
A variable name must start with a letter or an underscore "_"
A variable name can only contain alpha-numeric characters and underscores (a-z, A-Z, 0-9, and _ )
A variable name should not contain spaces. If a variable name is more than one word, it should be separated with an underscore ($my_string), or with capitalization ($myString)
PHP String Variables: A string variable is used to store and manipulate text.
String Variables in PHP:
String variables are used for values that contain characters.
the PHP script assigns the text "Hello World" to a string variable called $txt:
Eg: <?php
$txt="Hello World";
echo $txt;
?>
The output of the code above will be:
Hello World
PHP data types:
A data type refers to the type of data a variable can store. PHP has eight (8) different data types you can work with. These are:
PHP has eight data types:
Scalar types
- boolean
- integer
- float
- string
Compound types
- array
- object
Special types
- resources
- NULL
Boolean values:
In PHP the boolean data type is a primitive data type having one of two values: True or False. This is a fundamental data type.
<?php $male = False; $r = rand(0, 1); $male = $r ? True: False; if ($male) {echo "We will use name John\n"; } else {echo "We will use name Victoria\n"; } ?> |
The script uses a random integer generator to simulate our case.
$r = rand(0, 1);
The rand() function returns a random number from the given integer boundaries. In our case 0 or 1.
$male = $r ? True: False;
We use the ternary operator to set a $male variable. The variable is based on the random $r value. If $r equals to 1, the $male variable is set to True. If $r equals to 0, the $male variable is set to False.
if ($male) {
echo "We will use name John\n";
} else {
echo "We will use name Victoria\n";
}
We print the name. The if command works with boolean values. If the variable $male is True, we print the "We will use name John" to the console. If it has a False value, we print the other string.
The following script shows some common values that are considered to be True or False. For example, empty string, empty array, 0 are considered to be False.
<?php
class Object {};
var_dump((bool) "");
var_dump((bool) 0);
var_dump((bool) -1);
var_dump((bool) "PHP");
var_dump((bool) array(32));
var_dump((bool) array());
var_dump((bool) "false");
var_dump((bool) new Object());
var_dump((bool) NULL);
?>
In this script, we inspect some values in a boolean context. The var_dump()function shows information about a variable. The (bool) construct is called casting. In its casual context, the 0 value is a number. In a boolean context, it is False. The boolean context is when we use (bool) casting, when we use certain operators (negation, comparison operators) and when we use if/else, while keywords.
$ php boolean.php
bool(false)
bool(false)
bool(true)
bool(true)
bool(true)
bool(false)
bool(true)
bool(true)
bool(false)
Here is the outcome of the script.
Integers
Integers are a subset of the real numbers. They are written without a fraction or a decimal component. Integers fall within a set Z = {..., -2, -1, 0, 1, 2, ...} Integers are infinite.
In computer languages, integers are primitive data types. Computers can practically work only with a subset of integer values, because computers have finite capacity. Integers are used to count discrete entities. We can have 3, 4, 6 humans, but we cannot have 3.33 humans. We can have 3.33 kilograms.
Integers can be specified in three different notations in PHP. Decimal, hexadecimal and octal. Octal values are preceded by 0, hexadecimal by 0x.
<?php
$var1 = 31;
$var2 = 031;
$var3 = 0x31;
echo "$var1\n";
echo "$var2\n";
echo "$var3\n";
?>
We assign 31 to three variables using three notations. And we print them to the console.
$ php notation.php
31
25
49
The default notation is the decimal. The script shows these three numbers in decimal.
Integers in PHP have a fixed maximum size. The size of integers is platform dependent. PHP has built-in constants to show the maximum size of an integer.
$ uname -mo
i686 GNU/Linux
$ php -a
Interactive shell
php > echo PHP_INT_SIZE;
4
php > echo PHP_INT_MAX;
2147483647
php >
On my 32bit Ubuntu system, an integer value size is four bytes. The maximum integer value is 2147483647.
In Java and C, if an integer value is bigger than the maximum value allowed, integer overflow happens. PHP works differently. In PHP, the integer becomes a float number. Floating point numbers have greater boundaries.
<?php
$var = PHP_INT_MAX;
echo var_dump($var);
$var++;
echo var_dump($var);
?>
We assign a maximum integer value to the $var variable. We increase the variable by one. And we compare the contents.
$ php boundary.php
int(2147483647)
float(2147483648)
As we have mentioned previously, internally, the number becomes a floating point value.
In Java, the value after increasing would be -2147483648. This is where the term integer overflow comes from. The number goes over the top and becomes the smallest negative integer value assignable to a variable.
If we work with integers, we deal with discrete entities. We would use integers to count apples.
<?php
# number of baskets
$baskets = 16;
# number of apples in each basket
$apples_in_basket = 24;
# total number of apples
$total = $baskets * $apples_in_basket;
echo "There are total of $total apples \n";
?>
In our script, we count the total amount of apples. We use the multiplication operation.
$ php apples.php
There are total of 384 apples
Floating point numbers
Floating point numbers represent real numbers in computing. Real numbers measure continuous quantities. Like weight, height or speed. Floating point numbers in PHP can be larger than integers and they can have a decimal point. The size of a float is platform dependent.
We can use various syntax to create floating point values.
<?php
$a = 1.245;
$b = 1.2e3;
$c = 2E-10;
$d = 1264275425335735;
var_dump($a);
var_dump($b);
var_dump($c);
var_dump($d);
?>
In this example, we have two cases of notations, that are used by scientists to denote floating point values. Also the $d variable is assigned a large number, so it is automatically converted to float type.
$ php floats.php
float(1.245)
float(1200)
float(2.0E-10)
float(1264275425340000)
This is the output of the above script.
According to the documentation, floating point numbers should not be tested for equality. We will show an example why.
$ php -a
Interactive shell
php > echo 1/3;
0.333333333333
php > $var = (0.333333333333 == 1/3);
php > var_dump($var);
bool(false)
php >
In this example, we compare two values that seem to be identical. But they yield unexpected result.
Let's say a sprinter for 100m ran 9.87s. What is his speed in km/h?
<?php
# 100m is 0.1 km
$distance = 0.1;
# 9.87s is 9.87/60*60 h
$time = 9.87 / 3600;
$speed = $distance / $time;
echo "The average speed of a sprinter is $speed \n";
?>
ü In this example, it is necessary to use floating point values.
$speed = $distance / $time;
ü To get the speed, we divide the distance by the time.
$ php sprinter.php
The average speed of a sprinter is 36.4741641337
This is the output of the sprinter script. 36.4741641337 is a floating point number.
Strings
ü String is a data type representing textual data in computer programs. Probably the single most important data type in programming.
ü Since string are very important in every programming language, we will dedicate a whole chapter to them. Here we only drop a small example.
<?php
$a = "PHP ";
$b = 'PERL';
echo $a, $b;
echo "\n";
?>
ü We can use single quotes and double quotes to create string literals.
$ php strings.php
PHP PERL
ü The script outputs two strings to the console. The \n is a special sequence, a new line. The effect of this character is like if you hit the enter key when typing text.
Arrays
ü Array is a complex data type which handles a collection of elements. Each of the elements can be accessed by an index. In PHP, arrays are more diverse. Arrays can be treated as arrays, lists or dictionaries. In other words, arrays are all what in other languages we call arrays, lists, dictionaries.
ü Because collections are very important in all computer languages, we dedicate two chapters to collections - arrays. Here we show only a small example.
<?php
$names = array("Jane", "Lucy", "Timea", "Beky", "Lenka");
print_r($names);
?>
The array keyword is used to create a collection of elements. In our case we have names. The print_r function prints a human readable information about a variable to the console.
$ php init.php
Array
(
[0] => Jane
[1] => Lucy
[2] => Timea
[3] => Beky
[4] => Lenka
)
Output of the script. The numbers are indeces by which we can access the names.
Objects
So far, we have been talking about built-in data types. Objects are user defined data types. Programmers can create their data types that fit their domain. More about objects in chapter about object oriented programming, OOP.
Resources
Resources are special data types. They hold a reference to an external resource. They are created by special functions. Resources are handlers to opened files, database connections or image canvas areas.
NULL
There is another special data type - NULL. Basically, the data type means non existent, not known or empty.
In PHP, a variable is NULL in three cases:
- it was not assigned a value
- it was assigned a special NULL constant
- it was unset with the unset() function
<?php
$a;
$b = NULL;
$c = 1;
unset($c);
$d = 2;
if (is_null($a)) echo "\$a is null\n";
if (is_null($b)) echo "\$b is null\n";
if (is_null($c)) echo "\$c is null\n";
if (is_null($d)) echo "\$d is null\n";
?>
ü In our example, we have four variables. Three of them are considered to be NULL. We use the is_null() function to determine, if the variable is NULL.
$ php null.php
$a is null
$b is null
$c is null
The Concatenation Operator
ü There is only one string operator in PHP.
ü The concatenation operator (.) is used to put two string values together.
ü To concatenate two string variables together, use the concatenation operator:
<?php |
The output of the code above will be: Hello World! What a nice day!
The strlen() function:
ü The strlen() function is used to return the length of a string.
Let's find the length of a string:
Eg: <?php
echo strlen("Hello world!");
?>
The output of the code above will be: 12
The strpos() function:
ü The strpos() function is used to search for a character/text within a string.
Let's see if we can find the string "world" in our string:
Eg: <?php
echo strpos("Hello world!","world");
?>
The output of the code above will be: 6(position starts with ZERO)
Note: if match is found then it return character position other wise returns FALSE
PHP Operators:
PHP Operators
This section lists the different operators used in PHP.
Arithmetic Operators
Operator | Description | Example | Result |
+ | Addition | x=2 | 4 |
- | Subtraction | x=2 | 3 |
* | Multiplication | x=4 | 20 |
/ | Division | 15/5 | 3 |
% | Modulus (division remainder) | 5%2 | 1 |
++ | Increment | x=5 | x=6 |
-- | Decrement | x=5 | x=4 |
Assignment Operators
Operator | Example | Is The Same As |
= | x=y | x=y |
+= | x+=y | x=x+y |
-= | x-=y | x=x-y |
*= | x*=y | x=x*y |
/= | x/=y | x=x/y |
.= | x.=y | x=x.y |
%= | x%=y | x=x%y |
Comparison Operators
Operator | Description | Example |
== | is equal to | 5==8 returns false |
!= | is not equal | 5!=8 returns true |
<> | is not equal | 5<>8 returns true |
> | is greater than | 5>8 returns false |
< | is less than | 5<8 returns true |
>= | is greater than or equal to | 5>=8 returns false |
<= | is less than or equal to | 5<=8 returns true |
Logical Operators
Operator | Description | Example |
&& | and | x=6 (x < 10 && y > 1) returns true |
|| | or | x=6 (x==5 || y==5) returns false |
! | not | x=6 !(x==y) returns true |
Conditional operators:
Operator | Description | Example |
? : | Conditional Expression | If Condition is true ? Then value X : Otherwise value Y |
PHP supports following three decision making statements:
- if...else statement - use this statement if you want to execute a set of code when a condition is true and another if the condition is not true
- elseif statement - is used with the if...else statement to execute a set of code if one of several condition are true
- switch statement - is used if you want to select one of many blocks of code to be executed, use the Switch statement. The switch statement is used to avoid long blocks of if..elseif..else code.
The If...Else Statement
If you want to execute some code if a condition is true and another code if a condition is false, use the if....else statement.
Syntax
if (condition) code to be executed if condition is true; else code to be executed if condition is false; |
Example
The following example will output "Have a nice weekend!" if the current day is Friday, otherwise it will output "Have a nice day!":
<html> <body> <?php $d=date("D");if ($d=="Fri") echo "Have a nice weekend!"; else echo "Have a nice day!"; ?> </body> </html> |
If more than one line should be executed if a condition is true/false, the lines should be enclosed within curly braces:
<html> <body> <?php $d=date("D");if ($d=="Fri") {echo "Hello!<br />"; echo "Have a nice weekend!"; echo "See you on Monday!"; } ?> </body> </html> |
The ElseIf Statement
If you want to execute some code if one of several conditions are true use the elseif statement
Syntax
if (condition) code to be executed if condition is true; elseif (condition) code to be executed if condition is true; else code to be executed if condition is false; |
Example
The following example will output "Have a nice weekend!" if the current day is Friday, and "Have a nice Sunday!" if the current day is Sunday. Otherwise it will output "Have a nice day!":
<html> <body> <?php $d=date("D");if ($d=="Fri") echo "Have a nice weekend!"; elseif ($d=="Sun") echo "Have a nice Sunday!"; else echo "Have a nice day!"; ?> </body> </html> |
The Switch Statement
If you want to select one of many blocks of code to be executed, use the Switch statement.
The switch statement is used to avoid long blocks of if..elseif..else code.
Syntax
switch (expression) {case label1: code to be executed if expression = label1; break; case label2: code to be executed if expression = label2; break; default: code to be executed if expression is different from both label1 and label2; } |
Example
The switch statement works in an unusual way. First it evaluates given expression then seeks a lable to match the resulting value. If a matching value is found then the code associated with the matching label will be executed or if none of the lables match then statement will will execute any specified default code.
<html> <body> <?php $d=date("D");switch ($d) {case "Mon": echo "Today is Monday"; break; case "Tue": echo "Today is Tuesday"; break; case "Wed": echo "Today is Wednesday"; break; case "Thu": echo "Today is Thursday"; break; case "Fri": echo "Today is Friday"; break; case "Sat": echo "Today is Saturday"; break; case "Sun": echo "Today is Sunday"; break; default: echo "Wonder which day is this ?"; } ?> </body> </html> |
PHP supports following four loop types.
- for - loops through a block of code a specified number of times.
- while - loops through a block of code if and as long as a specified condition is true.
- do...while - loops through a block of code once, and then repeats the loop as long as a special condition is trur.
- foreach - loops through a block of code for each element in an array.
We will discuss about continue and break keywords used to control the loops execution.
The for loop statement
The for statement is used when you know how many times you want to execute a statement or a block of statements.
Syntax
for (initialization; condition; increment) {code to be executed; } |
The initializer is used to set the start value for the counter of the number of loop iterations. A variable may be declared here for this purpose and it is tradional to name it $i.
Example
The following example makes five iterations and changes the assigned value of two variables on each pass of the loop:
<html> <body> <?php $a = 0; $b = 0; for( $i=0; $i<5; $i++ ) {$a += 10; $b += 5; } echo ("At the end of the loop a=$a and b=$b" );?> </body> </html> |
This will produce following result:
At the end of the loop a=50 and b=25 |
The while loop statement
The while statement will execute a block of code if and as long as a test expression is true.
If the test expression is true then the code block will be executed. After the code has executed the test expression will again be evaluated and the loop will continue until the test expression is found to be false.
Syntax
while (condition) {code to be executed; } |
Example
This example decrements a variable value on each iteration of the loop and the counter increments until it reaches 10 when the evaluation is false and the loop ends.
<html> <body> <?php $i = 0; $num = 50; while( $i < 10) {$num--; $i++; } echo ("Loop stopped at i = $i and num = $num" );?> </body> </html> |
This will produce following result:
Loop stopped at i = 1 and num = 40 |
The do...while loop statement
The do...while statement will execute a block of code at least once - it then will repeat the loop as long as a condition is true.
Syntax
do {code to be executed; }while (condition); |
Example
The following example will increment the value of i at least once, and it will continue incrementing the variable i as long as it has a value of less than 10:
<html> <body> <?php $i = 0; $num = 0; do {$i++; }while( $i < 10 ); echo ("Loop stopped at i = $i" );?> </body> </html> |
This will produce following result:
Loop stopped at i = 10 |
The foreach loop statement
The foreach statement is used to loop through arrays. For each pass the the value of the current array element is assigned to $value and the array pointer is moved by one and in the next pass next element will be processed.
Syntax
foreach (array as value) {code to be executed; } |
Example
Try out following example to list out the values of an array.
<html> <body> <?php $array = array( 1, 2, 3, 4, 5); foreach( $array as $value ) {echo "Value is $value <br />"; } ?> </body> </html> |
This will produce following result:
Value is 1 Value is 2 Value is 3 Value is 4 Value is 5 |
The break statement
The PHP break keyword is used to terminate the execution of a loop prematurely.
The break statement is situated inside the statement block. If gives you full control and whenever you want to exit from the loop you can come out. After coming out of a loop immediate statement to the loop will be executed.
Example
In the following example condition test becomes true when the counter value reaches 3 and loop terminates.
<html> <body> <?php $i = 0; while( $i < 10) {$i++; if( $i == 3 )break; } echo ("Loop stopped at i = $i" );?> </body> </html> |
This will produce following result:
Loop stopped at i = 3 |
The continue statement
The PHP continue keyword is used to halt the current iteration of a loop but it does not terminate the loop.
Just like the break statement the continue statement is situated inside the statement blokc containing the code that the loop executes, preceded by a conditional test. For the pass encountering continue statement, rest of the loop code is skipped and next pass starts.
Example
In the following example loop prints the value of array but for which condition bceoms true it just skip the code and next valuye is printed.
<html> <body> <?php $array = array( 1, 2, 3, 4, 5); foreach( $array as $value ) {if( $value == 3 )continue; echo "Value is $value <br />"; } ?> </body> </html> |
This will produce following result
Value is 1 Value is 2 Value is 4 Value is 5 |
PHP Arrays:
ü An array stores multiple values in one single variable.
ü A variable is a storage area holding a number or text. The problem is, a variable will hold only one value.
ü An array is a special variable, which can store multiple values in one single variable.
If you have a list of items (a list of car names, for example), storing the cars in single variables could look like this:
$cars1="Saab"; |
ü However, what if you want to loop through the cars and find a specific one? And what if you had not 3 cars, but 300?
ü The best solution here is to use an array!
ü An array can hold all your variable values under a single name. And you can access the values by referring to the array name.
ü Each element in the array has its own index so that it can be easily accessed.
In PHP, there are three kind of arrays:
- Numeric array - An array with a numeric index
- Associative array - An array where each ID key is associated with a value
- Multidimensional array - An array containing one or more arrays
Numeric Arrays
ü A numeric array stores each array element with a numeric index.
ü There are two methods to create a numeric array.
1. In the following example the index are automatically assigned (the index starts at 0):
$cars=array("Saab","Volvo","BMW","Toyota");
2. In the following example we assign the index manually:
$cars[0]="Saab"; |
Example
In the following example you access the variable values by referring to the array name and index:
<?php |
The code above will output:
Saab and Volvo are Swedish cars.
Associative Arrays
An associative array, each ID key is associated with a value.
When storing data about specific named values, a numerical array is not always the best way to do it.
With associative arrays we can use the values as keys and assign values to them.
Example 1
In this example we use an array to assign ages to the different persons:
$ages = array("Peter"=>32, "Quagmire"=>30, "Joe"=>34);
Example 2
This example is the same as example 1, but shows a different way of creating the array:
$ages['Peter'] = "32"; |
The ID keys can be used in a script:
<?php |
The code above will output:
Peter is 32 years old.
Multidimensional Arrays
In a multidimensional array, each element in the main array can also be an array. And each element in the sub-array can be an array, and so on.
Example
In this example we create a multidimensional array, with automatically assigned ID keys:
$families = array |
The array above would look like this if written to the output:
Array |
Example 2
Lets try displaying a single value from the array above:
echo "Is " . $families['Griffin'][2] . |
The code above will output:
Is Megan a part of the Griffin family?
PHP Strings:
ü They are sequences of characters, like "PHP supports string operations".
Following are valid examples of string
$string_1 = "This is a string in double quotes"; $string_2 = "This is a somewhat longer, singly quoted string"; $string_39 = "This string has thirty-nine characters"; $string_0 = ""; // a string with zero characters |
ü Singly quoted strings are treated almost literally, whereas doubly quoted strings replace variables with their values as well as specially interpreting certain character sequences.
<? $variable = "name"; $literally = 'My $variable will not print!\\n'; print($literally); $literally = "My $variable will print!\\n"; print($literally); ?> |
This will produce following result:
My $variable will not print!\n My name will print |
There are no artificial limits on string length - within the bounds of available memory, you ought to be able to make arbitrarily long strings.
Strings that are delimited by double quotes (as in "this") are preprocessed in both the following two ways by PHP:
- Certain character sequences beginning with backslash (\) are replaced with special characters
- Variable names (starting with $) are replaced with string representations of their values.
The escape-sequence replacements are:
- \n is replaced by the newline character
- \r is replaced by the carriage-return character
- \t is replaced by the tab character
- \$ is replaced by the dollar sign itself ($)
- \" is replaced by a single double-quote (")
- \\ is replaced by a single backslash (\)
String Concatenation Operator
To concatenate two string variables together, use the dot (.) operator:
<?php $string1="Hello World"; $string2="1234"; echo $string1 . " " . $string2; ?> |
This will produce following result:
Hello World 1234 |
If we look at the code above you see that we used the concatenation operator two times. This is because we had to insert a third string.
Between the two string variables we added a string with a single character, an empty space, to separate the two variables.
Using the strlen() function
The strlen() function is used to find the length of a string.
Let's find the length of our string "Hello world!":
<?php echo strlen("Hello world!"); ?> |
This will produce following result:
12 |
The length of a string is often used in loops or other functions, when it is important to know when the string ends. (i.e. in a loop, we would want to stop the loop after the last character in the string)
Using the strpos() function
The strpos() function is used to search for a string or character within a string.
If a match is found in the string, this function will return the position of the first match. If no match is found, it will return FALSE.
Let's see if we can find the string "world" in our string:
<?php echo strpos("Hello world!","world"); ?> |
This will produce following result:
6 |
As you see the position of the string "world" in our string is position 6. The reason that it is 6, and not 7, is that the first position in the string is 0, and not 1.
PHP Functions:
ü The real power of PHP comes from its functions.
ü In PHP, there are more than 700 built-in functions.
A function is a piece of code which takes one more input in the form of parameter and does some processing and returns a value.
You already have seen many functions like fopen() and fread() etc. They are built-in functions but PHP gives you option to create your own functions as well.
There are two parts which should be clear to you:
- Creating a PHP Function
- Calling a PHP Function
In fact you hardly need to create your own PHP function because there are already more than 1000 of built-in library functions created for different area and you just need to call them according to your requirement.
Please refer to PHP Function Reference for a complete set of useful functions.
Creating PHP Function:
Its very easy to create your own PHP function. Suppose you want to create a PHP function which will simply write a simple message on your browser when you will call it. Following example creates a function called writeMessage() and then calls it just after creating it.
Note that while creating a function its name should start with keyword function and all the PHP code should be put inside { and } braces as shown in the following example below:
<html> <head> <title>Writing PHP Function</title> </head> <body> <?php /* Defining a PHP Function */ function writeMessage() { echo "You are really a nice person, Have a nice time!"; } /* Calling a PHP Function */ writeMessage(); ?> </body> </html> |
This will display following result:
You are really a nice person, Have a nice time! |
PHP Functions with Paramters:
PHP gives you option to pass your parameters inside a function. You can pass as many as parameters your like. These parameters work like variables inside your function. Following example takes two integer parameters and add them together and then print them.
<html> <head> <title>Writing PHP Function with Parameters</title> </head> <body> <?php function addFunction($num1, $num2) { $sum = $num1 + $num2; echo "Sum of the two numbers is : $sum"; } addFunction(10, 20); ?> </body> </html> |
This will display following result:
Sum of the two numbers is : 30 |
Passing Arguments by Reference:
It is possible to pass arguments to functions by reference. This means that a reference to the variable is manipulated by the function rather than a copy of the variable's value.
Any changes made to an argument in these cases will change the value of the original variable. You can pass an argument by reference by adding an ampersand to the variable name in either the function call or the function definition.
Following example depicts both the cases.
<html> <head> <title>Passing Argument by Reference</title> </head> <body> <?php function addFive($num) { $num += 5; } function addSix(&$num) { $num += 6; } $orignum = 10; addFive( &$orignum ); echo "Original Value is $orignum<br />"; addSix( $orignum ); echo "Original Value is $orignum<br />"; ?> </body> </html> |
This will display following result:
Original Value is 15 Original Value is 21 |
PHP Functions retruning value:
A function can return a value using the return statement in conjunction with a value or object. return stops the execution of the function and sends the value back to the calling code.
You can return more than one value from a function using return array(1,2,3,4).
Following example takes two integer parameters and add them together and then returns their sum to the calling program. Note that return keyword is used to return a value from a function.
<html> <head> <title>Writing PHP Function which returns value</title> </head> <body> <?php function addFunction($num1, $num2) { $sum = $num1 + $num2; return $sum; } $return_value = addFunction(10, 20); echo "Returned value from the function : $return_value ?> </body> </html> |
This will display following result:
Returned value from the function : 30 |
Setting Default Values for Function Parameters:
You can set a parameter to have a default value if the function's caller doesn't pass it.
Following function prints NULL in case use does not pass any value to this function.
<html> <head> <title>Writing PHP Function which returns value</title> </head> <body> <?php function printMe($param = NULL) { print $param; } printMe("This is test"); printMe(); ?> </body> </html> |
This will produce following result:
This is test |
Dynamic Function Calls:
It is possible to assign function names as strings to variables and then treat these variables exactly as you would the function name itself. Follwoing example depicts this behaviour.
<html> <head> <title>Dynamic Function Calls</title> </head> <body> <?php function sayHello() { echo "Hello<br />"; } $function_holder = "sayHello"; $function_holder(); ?> </body> </html> |
This will display following result:
Hello |
PHP Forms and User Input:
The PHP $_GET and $_POST variables are used to retrieve information from forms, like user input.
PHP Form Handling
The most important thing to notice when dealing with HTML forms and PHP is that any form element in an HTML page will automatically be available to your PHP scripts.
Example
The example below contains an HTML form with two input fields and a submit button:
<html> |
When a user fills out the form above and click on the submit button, the form data is sent to a PHP file, called "welcome.php":
"welcome.php" looks like this:
<html> |
Output could be something like this:
Welcome John!
You are 28 years old.
The PHP $_GET and $_POST variables will be explained in the next chapters.
Form Validation
User input should be validated on the browser whenever possible (by client scripts). Browser validation is faster and reduces the server load.
You should consider server validation if the user input will be inserted into a database. A good way to validate a form on the server is to post the form to itself, instead of jumping to a different page. The user will then get the error messages on the same page as the form. This makes it easier to discover the error.
PHP Files & I/O
Explain following functions related to files:
- Opening a file
- Reading a file
- Writing a file
- Closing a file
Opening and Closing Files
The PHP fopen() function is used to open a file. It requires two arguments stating first the file name and then mode in which to operate.
Files modes can be specified as one of the six options in this table.
Mode | Purpose |
r | Opens the file for reading only. |
r+ | Opens the file for reading and writing. |
w | Opens the file for writing only. |
w+ | Opens the file for reading and writing only. |
a | Opens the file for writing only. |
a+ | Opens the file for reading and writing only. |
If an attempt to open a file fails then fopen returns a value of false otherwise it returns a file pointer which is used for further reading or writing to that file.
After making a changes to the opened file it is important to close it with the fclose() function. The fclose() function requires a file pointer as its argument and then returns true when the closure succeeds or false if it fails.
Reading a file
Once a file is opend using fopen() function it can be read with a function called fread(). This function requires two arguments. These must be the file pointer and the length of the file expressed in bytes.
The files's length can be found using the filesize() function which takes the file name as its argument and returns the size of the file expressed in bytes.
So here are the steps required to read a file with PHP.
- Open a file using fopen() function.
- Get the file's length using filesize() function.
- Read the file's content using fread() function.
- Close the file with fclose() function.
The following example assigns the content of a text file to a variable then displays those contents on the web page.
<html> <head> <title>Reading a file using PHP</title> </head> <body> <?php $filename = "/home/user/guest/tmp.txt"; $file = fopen( $filename, "r" ); if( $file == false ) { echo ( "Error in opening file" ); exit(); } $filesize = filesize( $filename ); $filetext = fread( $file, $filesize ); fclose( $file ); echo ( "File size : $filesize bytes" ); echo ( "<pre>$text</pre>" ); ?> </body> </html> |
Writing a file
A new file can be written or text can be appended to an existing file using the PHP fwrite()function. This function requires two arguments specifying a file pointer and the string of data that is to be written. Optionally a third intger argument can be included to specify the length of the data to write. If the third argument is included, writing would will stop after the specified length has been reached.
The following example creates a new text file then writes a short text heading insite it. After closing this file its existence is confirmed using file_exist() function which takes file name as an argument
<?php $filename = "/home/user/guest/newfile.txt"; $file = fopen( $filename, "w" ); if( $file == false ) { echo ( "Error in opening new file" ); exit(); } fwrite( $file, "This is a simple test\n" ); fclose( $file ); ?> <html> <head> <title>Writing a file using PHP</title> </head> <body> <?php if( file_exist( $filename ) ) { $filesize = filesize( $filename ); $msg = "File created with name $filename "; $msg .= "containing $filesize bytes"; echo ($msg ); } else { echo ("File $filename does not exit" ); } ?> </body> </html> |