Web Technology - Introduction to PHP (Jntu-Anantapur)


G.PULLAIAH COLLEGE OF ENGINEERING & TECHNOLOGY KURNOOL

SUB: WEB TECHNOLOGIES (R09)

Unit-2

Introduction to PHP:

· PHP started out as a small open source project that evolved as more and more people found out how useful it was. Rasmus Lerdorf unleashed the first version of PHP way back in 1994.PHP is a recursive acronym for "PHP: Hypertext Preprocessor".

· PHP is a server side scripting language that is embedded in HTML. It is used to manage dynamic content, databases, session tracking, even build entire e-commerce sites.

· It is integrated with a number of popular databases, including MySQL, PostgreSQL, Oracle, Sybase, Informix, and Microsoft SQL Server.

· PHP is pleasingly zippy in its execution, especially when compiled as an Apache module on the Unix side. The MySQL server, once started, executes even very complex queries with huge result sets in record-setting time.

· PHP supports a large number of major protocols such as POP3, IMAP, and LDAP. PHP4 added support for Java and distributed object architectures (COM and CORBA), making n-tier development a possibility for the first time.

· PHP is forgiving: PHP language tries to be as forgiving as possible.

· PHP Syntax is C-Like.


Common uses of PHP:

· PHP performs system functions, i.e. from files on a system it can create, open, read, write, and close them.

· PHP can handle forms, i.e. gather data from files, save data to a file, thru email you can send data, return data to the user.

· You add, delete, and modify elements within your database thru PHP.

· Access cookies variables and set cookies.

· Using PHP, you can restrict users to access some pages of your website.

· It can encrypt data.


Characteristics of PHP

Five important characteristics make PHP's practical nature possible:

· Simplicity

· Efficiency

· Security

· Flexibility

· Familiarity


"Hello World" Script in PHP:

To get a feel for PHP, first start with simple PHP scripts. Since "Hello, World!" is an essential example, first we will create a friendly little "Hello, World!" script.

As mentioned earlier, PHP is embedded in HTML. That means that in amongst your normal HTML (or XHTML if you're cutting-edge) you'll have PHP statements like this:


<html>


<head>


<title>Hello World</title>


<body>


    <?php echo "Hello, World!";?>


</body>


</html>


It will produce following result:


Hello, World!


If you examine the HTML output of the above example, you'll notice that the PHP code is not present in the file sent from the server to your Web browser. All of the PHP present in the Web page is processed and stripped from the page; the only thing returned to the client from the Web server is pure HTML output.


All PHP code must be included inside one of the three special markup tags ate are recognised by the PHP Parser.


<?php PHP code goes here ?>


<?    PHP code goes here ?>


<script language="php"> PHP code goes here </script>


Most common tag is the <?php...?> and we will also use same tag in our tutorial.


From the next chapter we will start with PHP Environment Setup on your machine and then we will dig out almost all concepts related to PHP to make you comfortable with the PHP language.


In order to develop and run PHP Web pages three vital components need to be installed on your computer system.


· Web Server - PHP will work with virtually all Web Server software, including Microsoft's Internet Information Server (IIS) but then most often used is freely availble Apache Server. Download Apache for free here: http://httpd.apache.org/download.cgi


· Database - PHP will work with virtually all database software, including Oracle and Sybase but most commonly used is freely available MySQL database. Download MySQL for free here: http://www.mysql.com/downloads/index.html


· PHP Parser - In order to process PHP script instructions a parser must be installed to generate HTML output that can be sent to the Web Browser. This tutorial will guide you how to install PHP parser on your computer.


The problem with other Technologies


ü PHP is an open-source page scripting/templating system that is very similar to JSP and ASP.


ü It defines its own scripting language, which looks and feels a lot like Perl.


ü JSP uses Java as its scripting language (although some implementations support JavaScript, such as Caucho). ASP uses VBScript.


ü PHP is very popular -- it is used on over a million web sites -- but its main advantage (IMHO) seems to be that the language, being more "scripty" and Perl-like, is less intimidating to the great unwashed mass of HTML monkeys and hackers. In the long run, JSP and Java provide a more powerful system.


Here is a list of reasons why JSP is better than PHP:


  • Anything you can do with PHP, you can do with JSP; the reverse is not true


  • JSP is much more powerful, since it has access to all the Java libraries. PHP only has access to PHP libraries


  • JSP is Object-Oriented, so leads to cleaner code that's easier to debug, maintain, and improve. (PHP also allows objects, but the object model is more primitive, and most scripted pages ignore PHP objects and just use normal variables.)


  • The equivalent syntax in JSP is just as simple to learn, so you can get up and running just as quickly -- that is, there's no extra startup cost in using Java, at least not a significant one


  • Java programmers (as opposed to 15-year-old hackers or HTML monkeys) appreciate the importance of a clean language with complex OO data structures and strong typing


  • With JSP, if the code inside a page gets too big, or if you want to use it elsewhere, you can cut it out, make it into a Java class, and invoke it from anywhere in your application (even not from a page). With PHP, you're stuck inside the HTML box.


  • JSP's concept of state management and persistence is more explicit and powerful than PHP's. With JSP, you can specify whether a variable persists for the page, the request, the session, or the application (or if it's just local to the function). The JSP engine automatically does the right thing with cookies so you have access to the variable on later requests. With PHP, you just have "global" and "not global", you don't have automatic session management, and have to do your state thing manually with cookies or hidden variables.


PHP:


  • fast to develop (only small webs)


  • no security.


  • Nodebugging.


JSP:


  • security


  • reuse: You can make frontend in swing too.


  • speed: Once compiled, then much faster.


  • persistence


  • thread-save


  • load: It can serve more users.


  • debug: classes could be debuged well.


JSP:


JSP is easy to learn and allow developers to quickly produce web sites and applications in an open and standard way. JSP is based in Java, an object oriented language. JSP offers a robust platform for web development.

Main reasons to us JSP are:


· Multi platform


· component reuse by using Java Beans


· It also incorporates EJB


· it has every advantages that java provides


Servlet:


A servlet is a java component that can be plugged into Java enabled web server to provide custom services. Servlets are designed to work with in request response processing model. In a Request/Response model, a client sends a request to a server and the server responds by sending back a reply message can come in the form of an


· HTTP URL


· FTP URL


· a custom protocol


JSP VERSUS SERVLETS


Before the advent of JSP, the most used java technology that could generate dynamic web page content was Java Servlets. Because JSPs eventually are compiled into Java servlets, you can do as much with JSPs as you can do with Java servlets.


However Coding JSPs is easier than coding Java servlets. With Jsp, you place static text by coding HTML tags as opposes to java servlets ,in which you place static text by coding a many println statements. With JSPs,


you can change static text by changing HTML;and with servlets you can change static text by modifying a java servlet( this also adds to the compile/ debug cycle)


Combining Java Code and java cells into an HTML page is more easy than using straigt java code in a Servlet. Jsp syntax gives you a shortcut for coding dynamic Web pages, typically requiring much less code than java Servlet syntax..


Downloading, Installing and Configuring PHP:


Downloading


Although PHP comes bundled with most Linux distributions nowadays, you should download the latest stable version from the PHP Web site.


To decrease download time, choose from the approximately 100 mirrors residing in more than 50 countries,a list of which is available here: http://www.php.net/mirrors.php.


Configuring PHP:


Configuring PHP at Build Time on Linux:


ü Building PHP as described earlier in the chapter is sufficient for getting started; however,you should keep in mind many other build-time options are at your disposal.


ü You can view a complete list of configuration flags (there are more than 200) by executing the following:


%>./configure --help


To make adjustments to the build process, you just need to add one or more of these arguments to PHP’s configure command, including a value assignment if necessary.


For example, suppose you want to enable PHP’s FTP functionality, a feature not enabled by default. Just modify the configuration step of the PHP build process like so:


%>./configure --with-apxs2=/usr/local/apache2/bin/apxs --enable-ftp


As another example, suppose you want to enable PHP’s Java extension. Just reconfigure


PHP like so:


%>./configure --with-apxs2=/usr/local/apache2/bin/apxs \ >--enable-java=[JDK-INSTALL-DIR]


ü One common point of confusion among beginners is to assume that simply including additional flags will automatically make this functionality available via PHP.


ü This is not necessarily the case. Keep in mind that you also need to install the software that is ultimately responsible for enabling the extension support. In the case of the Java example.


Customizing the Windows Build


A total of 45 extensions are bundled with PHP 5.1 and 5.2, a number that was pared to


35 extensions with the current alpha version of PHP 6. However, to actually use any of these extensions, you need to uncomment the appropriate line within the php.ini file.


For example, if you’d like to enable PHP’s XML-RPC extension, you need to make a few minor adjustments to your php.ini file:


1. Open the php.ini file and locate the extension_dir directive and assign it


C:\php\ext\. If you installed PHP in another directory, modify this path accordingly.


2. Locate the line; extension=php_xmlrpc.dll. Uncomment this line by removing the preceding


Semicolon. Save and close the file.


3. Restart the Web server and the extension is ready for use from within PHP. Keep in mind that some


Extensions have additional configuration directives that may be found later in the php.ini file.


Run-Time Configuration


It’s possible to change PHP’s behavior at run time on both Windows and Linux through the php.ini file.


This file contains a myriad of configuration directives that collectively control the behavior of each product.


The remainder of this chapter focuses on PHP’s most commonly used configuration directives, introducing the purpose, scope, and default value of each.


Managing PHP’s Configuration Directives:


ü The php.ini File: The PHP distribution comes with two configuration templates, php.ini-dist and php.ini-recommended. You’ll want to rename one of these files to php.ini and place it in the location specified by the PHPIniDir directive found in Apache’s httpd.conf file.


The Apache httpd.conf and .htaccess Files:


ü When PHP is running as an Apache module, you can modify many of the directives through either the httpd.conf file or the .htaccess file. This is accomplished by prefixing directive/value assignment with one of the following keywords:


php_value: Sets the value of the specified directive.


php_flag: Sets the value of the specified Boolean directive.


php_admin_value: Sets the value of the specified directive. This differs from


ü php_value in that it cannot be used within an .htaccess file and cannot be overridden within virtual hosts or .htaccess.


• php_admin_flag: Sets the value of the specified directive. This differs from php_value in that it cannot be used within an .htaccess file and cannot be overridden within virtual hosts or htaccess.


Programming in a Web environment:


Choosing a Code Editor:


  1. Adobe Dreamweaver CS3:


ü Formerly known as Macromedia Dreamweaver MX, Adobe’s Dreamweaver CS3 is considered by many to be the ultimate Web designer’s toolkit.


ü Intended to be a onestop application, Dreamweaver CS3 supports all of the key technologies, such as Ajax, CSS, HTML, JavaScript, PHP, and XML, which together drive cutting-edge Web sites.


  1. Notepad++:


ü Notepad++ is a mature open source code editor and avowed Notepad replacement available for the Windows platform. Translated into 41 languages,


ü Notepad++ offers a wide array of convenient features one would expect of any capable IDE, including the ability to bookmark specific lines of a document for easy reference; syntax, brace, and indentation highlighting; powerful search facilities;


  1. PDT (PHP Development Tools):


ü The PDT project (http://www.eclipse.org/pdt/) is currently seeing quite a bit of momentum


  1. Zend Studio:


ü Zend Studio is far and away the most powerful PHP IDE of all commercial and open


source offerings available today


ü Facilities integrating code with popular databases such as MySQL, Oracle,PostgreSQL, and SQLite are also offered, in addition to the ability to execute SQL queries and view and manage database schemas and data.


ü Zend Studio (http://www.zend.com/products/zend_studio/) is available for the Windows, Linux, and Mac OS X platforms in two editions: standard and professional.


Choosing a Web Hosting Provider:


Generally speaking, hosting providers can be broken into three categories:


  1. Dedicated server hosting:


Dedicated server hosting involves leasing an entire Web server, allowing your Web site full reign over server CPU, disk space, and memory resources, as well as control over how the server is configured.


  1. Shared server hosting:


Shared server hosting is likely the ideal solution. Shared hosting providers capitalize on these factors by hosting numerous Web sites on a single server and using highly automated processes to manage system and network resources, data backups, and user support.


  1. Virtual private server hosting:


A virtual private server blurs the line between a dedicated and shared server, providing each user with a dedicated operating system and the ability to install applications and fully manage the server by way of virtualization.


Virtualization provides a way to run multiple distinct operating systems on the same server.


The anatomy of a PHP Page(or) Embedding PHP Code in Your Web Pages


One of PHP’s advantages is that you can embed PHP code directly alongside HTML. For the code to do anything, the page must be passed to the PHP engine for interpretation


There are four delimitation variants:


  1. Default Syntax


The default delimiter syntax opens with <?php and concludes with ?>, like this:


Eg:


<h3>Welcome!</h3>


<?php


echo "<p>Some dynamic output here</p>";


?>


<p>Some static output here</p>


Output:


clip_image002


  1. Short-Tags:


Syntax:


<?


print "This is another PHP example.";


?>


3. Script:


Syntax:


<script language="php">


print "This is another PHP example.";


</script>


4. ASP Style:


ü Microsoft ASP pages employ a similar strategy, delimiting static from dynamic syntax by using a predefined character pattern, opening dynamic syntax with <%, and concluding with %>.


Syntax:


<%


print "This is another PHP example.";


%>


Embedding Multiple Code Blocks:


ü You can escape to and from PHP as many times as required within a given page. For instance, the following example is perfectly acceptable:


<html>


<head>


<title><?php echo "Welcome to my Web site!";?></title>


</head>


<body>


<?php


$date = "July 26, 2007";


?>


<p>Today's date is <?=$date;?></p>


</body>


</html>


Commenting Your Code:


Single-Line C++ Syntax


ü Comments often require no more than a single line (//)


<?php


// Title: My first PHP script


// Author: Jason


echo "This is a PHP program";


?>


Shell Syntax:


ü PHP also supports an alternative to the C++-style single-line syntax, known as shell syntax, which is prefaced with a hash mark (#).


<?php


# Title: My PHP program


# Author: Jason


echo "This is a PHP program";


?>


Multiple-Line C Syntax L(/*………*/).


<?php


/*


Title: My PHP Program


Author: Jason


Date: July 26, 2007


*/


?>


Web Technology - Introduction to Web Servers (Jntu-Anantapur)

G.PULLAIAH COLLEGE OF ENGINEERING & TECHNOLOGY KURNOOL.

SUB: WEB TECHNOLOGIES (R09)

UNIT-1

Lecture notes:

Introduction to web servers:

What is web?

A collection of cross-linked “websites” which uses URI.

The consistent use of URIs to represent resources.

HTTP, HTML, and everything built around them(web)

Which provides to invoke the data across universally over the net

What is server?

A server is a computer or device on a network that manages network resources.

Most servers are dedicated. This means that they perform only one task rather than multiple tasks on multiprocessing operating systems, however, a single computer can execute several programs at once

What is web server?

A Web server is a program that generates and transmits responses to client requests for Web resources.

Handling a client request consists of several key steps:

Parsing the request message

Checking that the request is authorized

Associating the URL in the request with a file name

Constructing the response message

Transmitting the response message to the requesting client

The server can generate the response message in a variety of ways:

The server simply retrieves the file associated with the URL and returns the contents to the client.

The server may invoke a script that communicates with other servers or a back-end database to construct the response message.

Web Site versus Web Server?

Web site and Web server are different:

A Web site consists of a collection of Web pages associated with a particular hostname.

A Web server is a program to satisfy client requests for Web resources.

Types Of Web Servers:

1. Apache Web Server

  1. IIS Server
  2. Xampp Server
  3. WAMP Server

Apache Web Server:

Introduction:

Apache Web server is the most commonly used http server today. About 80% of all websites and Intranets use Apache web server to deliver their content to requesting Browsers.

Server side programming languages such as PHP, Perl, Python, Java and many others

The name "Apache" derives from the word "patchy" that the Apache developers used to describe early versions of their software.

The Apache Web server provides a full range of Web server features, including CGI, SSL, and virtual domains. Apache also supports plug-in modules for extensibility. Apache is reliable, free, and relatively easy to configure.

Apache is free software distributed by the Apache Software Foundation. The Apache Software Foundation promotes various free and open source advanced Web technologies.

It can be downloaded and used completely free of cost. The first version of Apache web server, based on the NCSA httpd Web server, was developed in 1995.

Apache is developed and maintained by an open community of developers under the auspices of the Apache Software Foundation.

The Internet’s Request / Response Way Of Working

Here’s the Internet’s Request / Response paradigm works.

Whenever a Browser makes an http request such as:http://www.google.com/index.html
the following happens:

http

This is the protocol used for communication between the Browser and the Web server. Since the Browser initiated the communication it has the privilege of setting the communication protocol.

://

This is a separator that separates the protocol from the URL.

www.google.com

This will be translated into a name:value pair i.e. ip:URL
by DNS servers. Hence this will translate to an ip74.86.170.172:www.google.com

clip_image002

Download Apache Web Server:

The latest stable build of Apache http server can be downloaded from URLhttp://httpd.apache.org/download.cgi

Downloading the Apache web server

 clip_image004

Open a browser window and enter http://www.google.com in the address bar and hit GO.

clip_image006clip_image008

Installing the Apache web server

clip_image010

clip_image012clip_image014

I recommend to run the Apache HTTP server as a service. This way it is always running and you don't need to start it manually. If you consider manually start and stop because of security issues, then reconsider and use a firewall, preferable one running on an external device like a router.

The next step allows you to select the install type of the Apache web server. The default (Typical program features) is probably right for your situation, so press Next.

Next, you can select the destination folder of the installation. Unless you prefer to use a different folder for some or all of the software you install, I recommend to use the default setting: C:\Program Files\Apache Group\

Finally, after clicking on the Next button you can start the actual installation by pressing the Install button. A few windows pop up and go automatically, and then a Windows Security Alert window appears asking if you want to keep blocking this (Apache HTTP server) program.

 clip_image016

Windows Security Alert for the Apache HTTP server.

The download process of the Apache Web Server setup file is successfully finished.

Testing the Apache HTTP server installation

In order to test your Apache web server installation, open a browser and enter http://localhost/ into the address bar (unless you used a different value then localhost in the Apache server information step). The Test Page for Apache installation should be displayed into your browser.

clip_image018

Part of the Apache HTTP server test page in Mozilla Firefox

Understanding the Apache server folder structure

clip_image020

The bin folder

The bin folder contains amongst other files the server executable: Apache.exe and a program to control the Apache HTTP server when ran as service: ApacheMonitor.exe. Also contained in this folder are htpasswd.exe and htdigest.exe for making parts of your site(s) restricted.

The cgi-bin folder

The cgi-bin folder has one CGI program written in Perl, printenv.pl, which you can use to test if your Perl installation is working in combination with the Apache HTTP server. If you get a "500 Internal Server Error" when you enter http://localhost/cgi-bin/printenv.pl in the address bar of your browser, you either have Perl not installed, or the configuration of the web server is not right. You might want to check the error.log file in the logs folder in the latter case.

The conf folder

This folder holds the configuration files used by the Apache web server. Of each file used by the server there is a copy which has .default in its name, e.g. httpd.default.conf. The access.conf and srm.conf files are empty (except for comments) by default, and I recommend to not use those files for configuring the server. The httpd.conf file has already been updated by the installation process. I list some of those modified settings below, including a short description and the line number (which might differ with your version).

  • Listen 80 - The port the Apache server is using. If you have already a web server running, for example as part of Microsoft Internet Information Services (IIS), you might want to change the number to something different (line 120).
  • ServerAdmin admin@localhost - The email address of the server administrator, which is used on, for example, error pages generated by the server (line 198).
  • ServerName localhost:80 - The hostname and port the server uses (line 212).

Some of the other settings are omitted since they will be overridden by the name-based virtual hosting set up discussed below.

htdocs

This folder contains the default HTML page you see when you visit http://localhost/ with your web browser. Don't start adding your HTML documents and related files to this folder, but read on.

manual

This folder contains the Apache HTTP server documentation, available as http://localhost/manual/. Note that this folder shows up under the document root thanks to the AliasMatch directive in the httpd.conf server configuration file (line 491).

logs

This folder contains (amongst others) the access.log and error.log files. If anything goes wrong, for example the notorious 500 Internal Server Error, make sure that you check the error.log file. With virtual hosting you can give each site its own log file (discussed below), so be sure to check the right file(s).

Setting up virtual Hosting

To make the configuration of virtual hosts as easy as possible I decided to store the configuration settings into a separate file instead of adding those settings to the Apache server configuration file httpd.conf.

Login to the computer with Administrator rights, and create an empty file named virtual-hosts.conf inside the conf folder of the Apache HTTP server. The default location of this folder after installation is C:\Program Files\Apache Group\Apache2\conf\.

Note: in an earlier version of this article I stored the virtual hosts file inside a folder with limted user rights which implied that this file has the same rights. Since this file is interpreted by the Apache web server this is a security risk if this limited user account is compromised.

Adding the domains to the hosts file

For each website you want to have running locally you have to think up a domain name with great care. I use the same domain name as the real site with lc. added to the front (hence a subdomain) since I am very sure that this subdomain isn't used on the Internet in my case.

Add each domain name to the hosts file used by Windows XP, which is located in the C:\WINDOWS\system32\drivers\etc folder for a default installation. An example configuration might be (comments on top not included for brevity):

127.0.0.1   localhost


127.0.0.1   lc.johnbokma.com    # my personal site


127.0.0.1   lc.castleamber.com  # my company's site


Note that everything after the # character is regarded as a comment. You can use this to add useful comments. The IP address, 127.0.0.1, means "this computer" (localhost). If you want to use the web server in a local network, you have to use an IP address that can be contacted by other computers in the network. Also, you either have to modify all hosts files on each and every computer, or set up a name server.


Including the virtual-hosts.conf file


Add the following line to the end of the httpd.conf file in the C:\Program Files\Apache Group\Apache2\conf folder in order to include the virtual-hosts.conf file and make it part of the configuration of the web server:


Include conf/virtual-hosts.conf


Since the ServerRoot in the default install is set to the folder that contains the conf folder we can use the short relative notation as given above. Note: where filenames are specified, you must use forward slashes instead of backslashes (e.g. conf/virtual-hosts.conf instead of conf\virtual-hosts.conf).


Stopping and starting Apache


After changes have been made to the httpd.conf file and/or the virtual-hosts file, Apache has to be restarted. If you are logged in with Administrator rights the easiest way to do this is by using the Apache monitor which is started when you log in and available via the system tray. Click the right mouse (context menu) button on the red feather icon in the system tray and select the Open Apache Monitor menu entry. You can restart the Apache HTTP server with a single mouse click on the Restart button.


clip_image022


The Apache service monitor.


Note that during installation of the Apache web server a short cut to the Apache service monitor is created in the Startup folder of "All Users" (i.e. C:\Documents and Settings\All Users\Start Menu\Programs\Startup) which is quite useless. Users with limited access rights are not able to control the Apache service but will get the Apache monitor running in their system tray anyway. You might want to move the short cut to the Startup folder of a user with Administrator rights.


Another way to restart Apache is by entering in a command prompt window NET STOP APACHE2 followed by enter, followed by NET START APACHE2 to stop and start the Apache service:


NET STOP APACHE2


The Apache2 service is stopping.


The Apache2 service was stopped successfully.


NET START APACHE2


The Apache2 service is starting.


The Apache2 service was started successfully


Creating virtual hosts on Apache 2.2


This tutorial is intended for use only in a local testing environment on Windows. For a production server, please refer to the official documentation on the Apache site.


ü Apache 2.2 adopts a modular approach to its main configuration file, httpd.conf. Although you can still put everything in the one big file, it's more efficient to use external files, and include only those that you need to implement. Consequently, it's no longer recommended to define virtual hosts at the bottom of httpd.conf. Instead, you include an external file called httpd-vhosts.conf.


ü The other change is that Apache 2.2 imposes stricter permissions than previous series, so you need to add an extra command to the virtual hosts definition to prevent getting the following message when accessing a virtual host:


  • Forbidden


    You don't have permission to access /index.php on this server.


Because of the permissions issue, I recommend creating a top-level folder to hold all virtual hosts in your local development environment. The following instructions assume that all virtual hosts are located in a folder called C:\vhosts.


NOTE: Security restrictions on Windows Vista and Windows 7 prevent you from saving edits to the files referred to in these instructions, even if you are logged in as an administrator. To get around this restriction, open Notepad or your script editor from the Start menu by right-clicking the program name and selecting "Run as Administrator" from the context menu. Then open the relevant files by using File > Open inside the program you have just launched. By default, Notepad shows only files with a .txt file name extension, so you need to select the option to view All Files (*.*) in the Open dialog box. You can then save the files normally after editing them. (If you're using XAMPP, this restriction applies only to steps 2–4.)


1. Create a subfolder inside C:\vhosts for each virtual host that you want to add to your Apache server.


2. Open C:\WINDOWS\system32\drivers\etc\hosts in Notepad or a script editor. Look for the following line at the bottom:


127.0.0.1   localhost


3. On a separate line, enter 127.0.0.1, followed by some space and the name of the virtual host you want to register. For instance, to set up a virtual host called phpdw, enter the following:


127.0.0.1   phpdw


4. Add any further virtual hosts, each one on a separate line and pointing to the same IP address (127.0.0.1). Save the hosts file, and close it.


5. Open C:\Program Files\Apache Software Foundation\Apache2.2\conf\httpd.confin a text editor. If you're using XAMPP, the file is located at C:\xampp\apache\conf\httpd.conf. Scroll down to the Supplemental configuration section at the end, and locate the following section (around line 460):


6. #Virtual hosts


#Include conf/extra/httpd-vhosts.conf


7. Remove the # from the second line so the section now looks like this:


8. #Virtual hosts


Include conf/extra/httpd-vhosts.conf


9. Save httpd.conf and close it.


10. Open C:\Program Files\Apache Software Foundation\Apache2.2\conf\extra\httpd-vhosts.conf in Notepad or a text editor. If you're using XAMPP, the location is C:\xampp\apache\conf\extra\httpd-vhosts.conf. The main section looks like this:


clip_image023


Note: In XAMPP, all lines are commented out. You must remove the hash mark from the beginning of the line that contains the following directive:


NameVirtualHost *.80


11. Position your cursor in the blank space shown on line 15 in the preceding screenshot, and insert the following four lines of code:


12.<Directory C:/vhosts>


13.  Order Deny,Allow


14.  Allow from all


</Directory>


This sets the correct permissions for the folder that contains the sites you want to treat as virtual hosts. If you chose a location other than C:\vhosts as the top-level folder, replace the pathname in the first line. The pathname must use forward slashes in place of the Windows convention of backward slashes. Also surround the pathname in quotes if it contains any spaces.


As long as all your virtual hosts are in subfolders of this top-level folder, this directive sets the correct permissions for all of them. However, if they are in different top-level folders, create a separate <Directory> directive for each one.


15. The code shown on lines 27 through 42 in the preceding screenshot shows examples of how to define virtual hosts (in XAMPP, they're commented out). It shows all the commands that can be used, but only DocumentRoot and ServerName are required.


ü When you enable virtual hosting, Apache disables the main server root, so the first definition needs to reproduce the original server root. You then add each new virtual host within a pair of <VirtualHost> tags, using the location of the site’s web files as the value for DocumentRoot, and the name of the virtual host for ServerName. Again, use forward slashes, and if the path contains any spaces, enclose the whole path in quotes. If your server root is located, like mine, at C:\htdocs, and you are adding phpdw as a virtual host in C:\vhosts, change the code shown on lines 27 through 42 so they look like this (in XAMPP, just add these new directives at the bottom of the file, and set the DocumentRoot for localhost to C:/xampp/htdocs):


<VirtualHost *:80>


  DocumentRoot c:/htdocs


  ServerName localhost


</VirtualHost>


<VirtualHost *:80>


  DocumentRoot c:/vhosts/phpdw


  ServerName phpdw</VirtualHost>


16. Save httpd-vhosts.conf, and restart your computer. All sites in the server root will continue to be accessible through http://localhost/sitename/. Anything in a virtual host will be accessible through a direct address, such as http://phpdw/.


17. If you still have difficulty accessing your virtual hosts, make sure that you have addedindex.php to the DirectoryIndex directive in httpd.conf.


To create a virtual directory on a machine running Apache Web server software:


Note: The Apache Web server uses the term alias instead of virtual directory.


1. Locate the conf/httpd.conf file in the Apache install directory.


2. Add an entry near the end of the file that looks like this. Be careful that it is not in the middle of some other entry:


Alias /site_name "C:\pathname_to_site\your_site_directory"


<Directory "C:\pathname_to_site\your_site_directory">


Options Indexes FollowSymLinks MultiViews ExecCGI


AllowOverride All


Order allow,deny


Allow from all


</Directory>


3. In the entry added in step 2, replace site_name with the alias for your site and replace C:\pathname_to_site\your_site_directory with the actual file path name to your site's root directory. If the server is running on Linux, the format of the path name would be a UNIX path name rather than the Windows-style pathname shown in the example.


4. Restart the Apache server to have the change take effect.


Wamp server:


Setting Up a WAMP Server


ü A WAMP Server is a Windows Machine that has Apache, MySQL, and PHP on it (WAMP – Windows, Apache, MySQL, PHP) To install these before you would have to get the installs and binaries and configure them yourself and set everything up which can be a tedious task as well as very time consuming.


ü Now, thanks to sourceforge, you can get this functionality by simply installing an application. Once you are finished with this tutorial you will be able to follow our web-based tutorials without having a domain name and/or server. Let’s get started. First we need to download our software from wampserver.com.


clip_image025


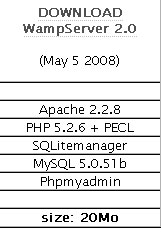
Once on that site look for the above box to appear and click on Download WAMP Server 2.0


clip_image026


Save the file somewhere that you will be able to get to once it is finished completing. It is approximately 20 Megabytes, so depending on your connection; it may take a few minutes.


clip_image027


You should now see this icon wherever you chose to save the file. Double-click on it to start the installation.


clip_image028


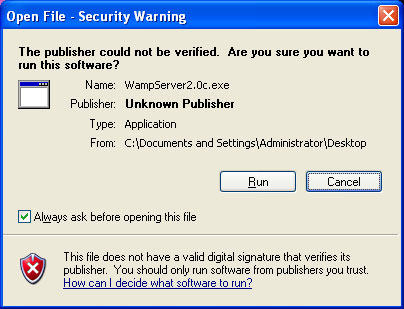
Select to run the file if you are prompted to do so.


clip_image029


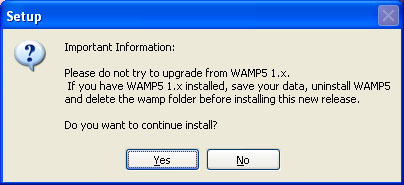
You will be prompted to not install this version over WAMP5 1.x. Click yes to continue with the installation.


clip_image031


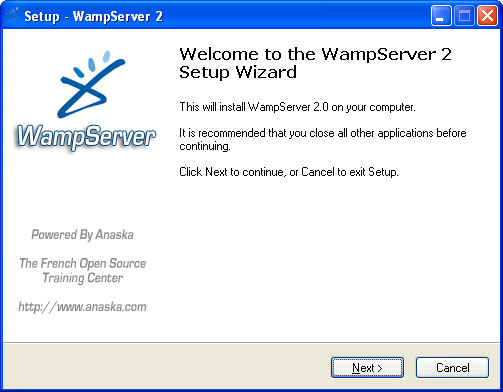
This first install window simply welcomes you to the installer for this application. Click next to continue.


clip_image033


This window contains the GNU GENERAL PUBLIC LICENSE that will allow you to use this software. Once you review this click the I Accepts radial button and click next to continue.


clip_image035


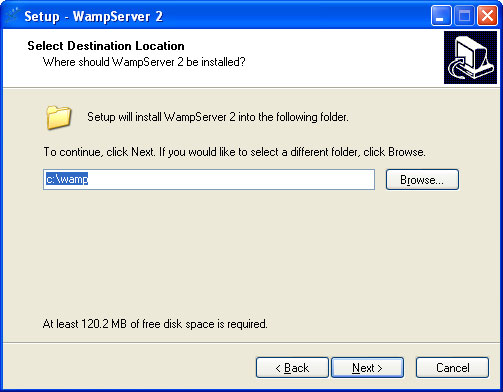
This box let’s you pick where you would like to install all of the files. You can change this if you like but if you do, bear in mind that you should put it in a folder that does not contain any spaces as some browsers/servers have issues handling spaces in file names. This is also where your web files will be stored under a directory called ‘www’. If you are unsure, leave this default.


clip_image037


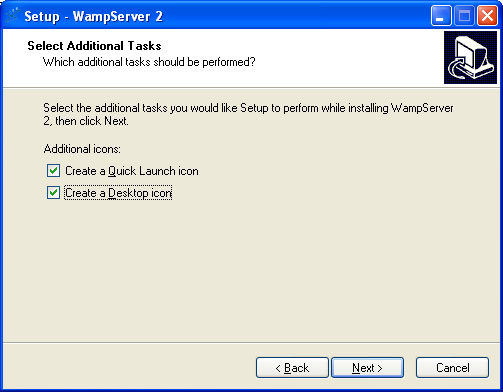
This window will allow you to create the desktop icon and the quick launch icon to start the server by the click of a button.


clip_image039


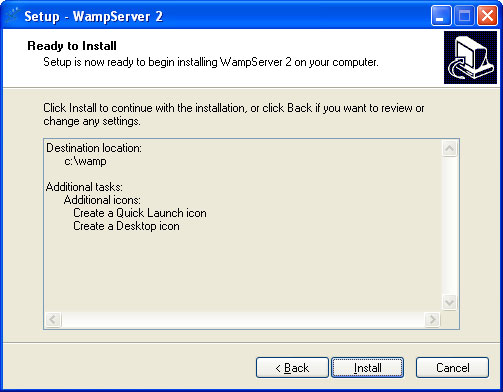
This window just reviews all installation options. Verify the settings are correct and click next to start installing the application.


clip_image041


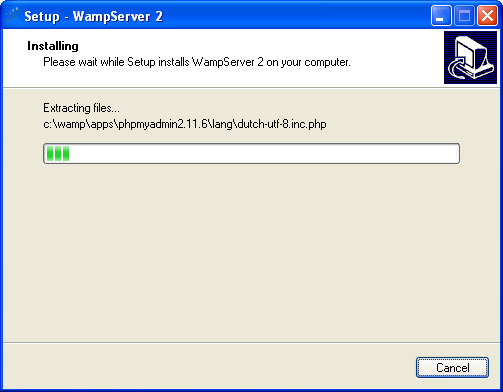
This is installing the software.


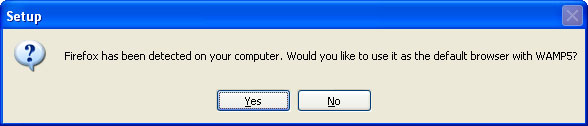
clip_image043


You will get the above prompt to configure FireFox as your default browser for the WAMP Server if you would like, otherwise it will use Internet Explorer.


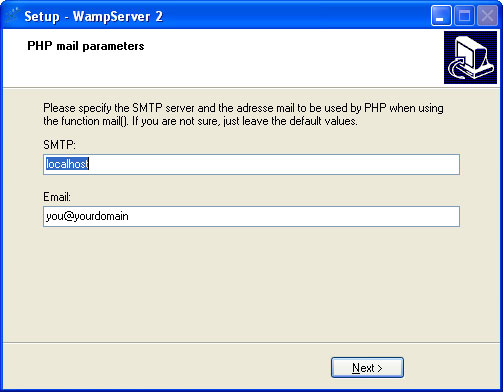
clip_image045


This window will allow you to configure your server to forward any e-mail that your php creates to a proper server and e-mail account so that they will go to the right person once you are using it. If you don’t know these values or have the ability to use them, just leave them default.


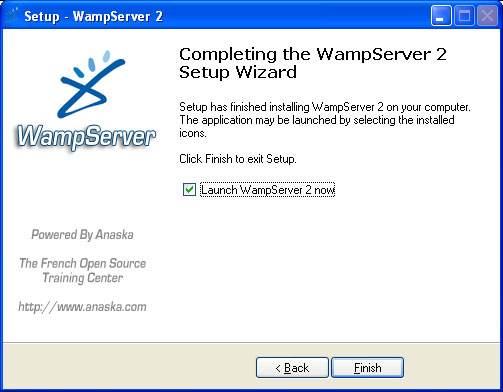
clip_image047


This is the completion window. You have the ability to launch the server automatically after closing this window if you would like. Click Finish to start the application.


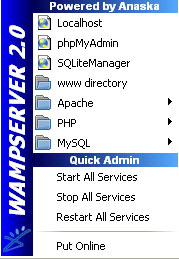
clip_image048


Once the server is running, you will see the above icon and the taskbar for the WAMP Server.


clip_image049


INSTALLING, CONFIGURING, AND DEVELOPING WITH XAMPP


About XAMPP and Installation Requirements XAMPP is a small and light Apache distribution containing the most common web development technologies in a single package.


Its contents, small size, and portability make it the ideal tool for students developing and testing applications in PHP and MySQL. XAMPP is available as a free download in two specific packages: full and lite.


While the full package download provides a wide array of development tools, this article will focus on using XAMPP Lite which contains the necessary technologies that meet the Ontario Skills Competition standards. As the name implies, the light version is a small package containing Apache HTTP Server, PHP, MySQL, phpMyAdmin, Openssl, and SQLite. For more details on the packaging and versions


Obtaining and Installing XAMPP


As previously mentioned, XAMPP is a free package available for download and use for various web development tasks.


All XAMPP packages and add-ons are distributed through the Apache Friends website at the address: http://www.apachefriends.org/. Once on the website, navigate and find the Windows version of XAMPP Lite and download the self-extracting ZIP archive.


After downloading the archive, run and extract its contents into the root path of a hard disk or USB drive.


For example, the extract path for a local Windows installation would simply be C:\. If extracted properly you will notice a new xampplite directory in the root of your installation disk. In order to test that everything has been installed correctly, first start the Apache HTTP Server by navigating to the xampplite directory and run the apache_start.bat batch file.


clip_image051

CS2201 Data Structures – Unit 1 and Unit 2 Important 2 and 16 Marks with Answers

Anna University

Department of Computer Science Engineering

Third Semester

CS2201 Data Structures

(Regulation 2008)


Unit - I LINEAR STRUCTURES

PART - A

1. Write down the definition of data structures?

A data structure is a mathematical or logical way of organizing data in the memory that consider not only the items stored but also the relationship to each other and also it is characterized by accessing functions.


2. List down any four applications of data structures?

Ø Compiler design

Ø Operating System

Ø Database Management system

Ø Network analysis


3. What is meant by an abstract data type(ADT)?

An ADT is a set of operation. A useful tool for specifying the logical properties of a datatype is the abstract data type. ADT refers to the basic mathematical concept that defines the datatype. Eg. Objects such as list, set and graph along their operations can be viewed as ADT's


4. What are the operations of ADT?

Union, Intersection, size, complement and find are the various operations of ADT.


5. What is meant by list ADT?

List ADT is a sequential storage structure. General list of the form a1, a2, a3.…., an and the size of the list is 'n'. Any element in the list at the position I is defined to be ai, ai+1 the successor of ai and ai-1 is the predecessor of ai.


6.What are the various operations done under list ADT?

Ø Print list

Ø Insert

Ø Make empty

Ø Remove

Ø Next

Ø Previous

Ø Find kth


7. What is single linked list?

It is a linear data structure which consists a pointer field that points to the address of its next node (successor) and the data item.


8. Define double linked list?

It is linear data structure which consists of two links or pointer fields

Ø Next pointer points to the address of the next(successor) node.

Ø Previous pointer points to the address of the previous(predecessor) node.


9. What is meant by dummy header?

It is ahead node in the linked list before the actual data nodes.

Header of the linked list is the first element in the list and it stores the number of elements in the list. It points to the first data element of the list.


10. Difference between Arrays and Linked List?

Arrays

Linked List

Size of any array is fixed

Size of list is variable

It is necessary to specify the number of

elements during declaration

It is not necessary to specify the

number of elements during declaration

Insertion and deletions are difficult and

costly

Insertions and deletions are done in

less time

It occupies less memory than a linked

list

It occupies more memory

Coding is easy

Careful coding is needed to avoid

memory errors.


11. List three examples that uses linked list?

Ø Polynomial ADT

Ø Radix sort

Ø Multi lists


12. What are the advantages in the array implementation of list?

a) Print list operation can be carried out at the linear time

b) Find Kth operation takes a constant time


13. What is a Stack?

A Stack is an ordered collection of items into which new items may be inserted and from

which items may be deleted at one end, called the top of the stack. The other name of stack is Last-in -First-out list.


14. What are the two operations of Stack?

Ø PUSH

Ø POP


15. What is a Queue?

A Queue is an ordered collection of items from which items may be deleted at one end called the front of the queue and into which tems may be inserted at the other end called rear of the queue.Queue is called as First –in-First-Out (FIFO).


16. Mention applications of stack?

Ø Evaluation of arithmetic expressions

Ø Balancing the symbols

Ø Function calls

Ø Tower of Hanoi

Ø Reversing a string

Ø 8-Queen’s Problem


17. Define Infix, prefix and postfix notations?

Ø Infix operators are placed in between the operands

Ø Prefix operators are placed before the operands

Ø Postfix Operators are placed after the operands.


18. Mention applications of queue.

Ø Batch processing in an operating system.

Ø To implement priority queue.

Ø Simulation

Ø Mathematics user queuing theory.

Ø Computer networks where the server takes the jobs of the client as per the queue strategy.


19. Define Priority Queue.

Priority queue is a queue in which inserting an item or removing an item can be performed from any position based on some priority.


20. Convert the expression ((A + B) * C – (D – E) ^ (F + G)) to equivalent Postfix notations.

Postfix Notation: AB + C * DE - - FG + ^


21. Write the structure implementation file for singly linked list.

struct Node

{

ElementType Element;

struct Node *Next;

};


22. Write the structure implementation file for doubly linked list.

struct Node

{

ElementType Element;

struct Node *FLINK;

struct Node *BLINK;

};


23. Write a routine to return a position of an element.

Position Find(int X, List L)

{

Position P;

P=LàNext;

while(P!=NULL && PàElement!=X)

P=PàNext;

Return P;

}


24. Mention DLL advantages and disadvantages.

Advantage:

Ø Deletion operation is easier.

Ø Finding the predecessor and successor of a node is easier.

Disadvantage:

Ø More memory space is required since it has two pointers.


25. What are the ways a stack can be implemented?

Stack can be implemented two ways, they are

Ø Array implementation

Ø Linked list implementation


26. What are the three ways to represent arithmetic expression?

  1. Infix Notation
  2. Prefix Notation
  3. Postfix Notation


27. What is meant by Dequeue? Why it is used?

Dequeue is the Double Ended Queue. Which is used to insert and delete operations are performed at the both the ends.


28. Write the procedure to insert and delete an element in a queue.

To insert an element X onto the queue Q, the rear pointer is incremented by 1 and then set Queue[Rear] = X.

To delete an element from the queue Q, the Queue[Front] is returned and the Front pointer is incremented by 1


29. What is the principle of Radix sort?

Radix sort – sorts on the least significant digits first. On the first pass entire numbers sort on the least significant digit and combines in an array. Then on the second pass, the entire numbers are sorted again on the second least-significant digits and combine in a array and so on.


30. How do you push and pop elements in a linked stack?

We perform a PUSH operation by inserting at the front of the list.

We perform a POP operation by deleting the element at the front of the list.


31. Swap two adjacent elements by adjusting only the pointers (and not the data) using: singly linked list.

void swap_with_nest(Posiiton P, before P, List L)

{
Position P, After P;

P=before PàNext;

After P=PàNext;

PàNext=After PàNext;

Before PàNext=After P;

After PàNext=P;

}

PART – B

  1. Explain in detail about the linked list implementation using an example.
  2. What is a DLL? Explain the algorithm in detail for inserting and deleting a node from DLL?
  3. Describe the Cursor-based linked list with its implementation in detail. (OR)

Explain Cursor implementation of linked list operations in detail.

  1. Explain in detail three applications of linked list with suitable example.
  2. Describe circular queue implementation in detail giving all the relevant features.
  3. Explain the process of postfix expression evaluation with an example.
  4. Write a procedure to convert the given infix expression to postfix expression using stack.
  5. Explain in detail any three applications of stack.
  6. Explain how linked list is used for polynomial multiplication.
  7. Write the functions to perform the insert and delete operations on queue.
  8. What is stack ADT? Explain how it can be implemented using arrays.
  9. Write ADT operations for array implementation of polynomial addition.
  10. Write ADT operations for array implementation of a queue.
  11. Write suitable routines to perform insertion and deletion operations in a linked queue.
  12. Explain how the given expression is converted into postfix expression using stack.
    A+((B*D+E/F)^G-H)/C+E*F)-B*E

Unit - II TREE STRUCTURES

PART - A

1. Define tree?

Trees are non-liner data structure, which is used to store data items in a shorted sequence. It represents any hierarchical relationship between any data Item. It is a collection of nodes, which has a distinguish node called the root and zero or more non-empty sub trees T1, T2,….Tk. each of which are connected by a directed edge from the root.


2. Define Height of tree?

The height of n is the length of the longest path from root to a leaf. Thus all leaves have height zero. The height of a tree is equal to a height of a root.


3. Define Depth of tree?

For any node n, the depth of n is the length of the unique path from the root to node n. Thus for a root the depth is always zero.


4. What is the length of the path in a tree?

The length of the path is the number of edges on the path. In a tree there is exactly one path form the root to each node.


5. Define sibling?

Nodes with the same parent are called siblings.


6. Define binary tree?

A Binary tree is a finite set of data items which is either empty or consists of a single item called root and two disjoin binary trees called left sub tree max degree of any node is two.


7. What are the two methods of binary tree implementation?

Two methods to implement a binary tree are,

a. Linear representation.

b. Linked representation


8. What are the applications of binary tree?

Binary tree is used in data processing.

a. File index schemes

b. Hierarchical database management system


9. List out few of the Application of tree data-structure?

Ø The manipulation of Arithmetic expression

Ø Used for Searching Operation

Ø Used to implement the file system of several popular operating systems

Ø Symbol Table construction

Ø Syntax analysis


10. Define expression tree?

Expression tree is also a binary tree in which the leafs terminal nodes or operands and non-terminal intermediate nodes are operators used for traversal.


11. Write the procedure to construct the expression trees?

1. Convert the given infix expression into postfix notation

2. Create a stack and read each character of the expression and push into the stack, if operands are encountered.

3. When an operator is encountered pop 2 values from the stack.


12. Define tree traversal and mention the type of traversals?

Visiting of each and every node in the tree exactly is called as tree traversal.

Three types of tree traversal

1. Inorder traversal

2. Preoder traversal

3. Postorder traversal.


13. Define in -order traversal?

In-order traversal entails the following steps;

a. Traverse the left subtree

b. Visit the root node

c. Traverse the right subtree


14. Define threaded binary tree.

A binary tree is threaded by making all right child pointers that would normally be null point to the inorder successor of the node, and all left child pointers that would normally be null point to the inorder predecessor of the node.


15. What are the types of threaded binary tree?

Right-in threaded binary tree

Left-in threaded binary tree

Fully-in threaded binary tree


16. Define Binary Search Tree.

Binary search tree is a binary tree in which for every node X in the tree, the values of all the keys in its left subtree are smaller than the key value in X and the values of all the keys in its right subtree are larger than the key value in X.


17. List out the steps involved in deleting a node from a binary search tree.

  1. Deleting a node is a leaf node (ie) No children
  2. Deleting a node with one child.
  3. Deleting a node with two Childs.


18.Show the result of inserting 3,1,4,6,9,2,5,7 into an initially empty binary search tree.

clip_image001


19. Define lazy deletion?

When an element is to be deleted it is left in the tree itself and marked a s being deleted. This is called as lazy deletion and is an efficient procedure if duplicate keys are present in the binary search tree, because the field that keeps count of the frequency of appearance of the element can be decremented of the element can be decremented.


20. Define complete binary tree.

If all its levels, possible except the last, have maximum number of nodes and if all the nodes in the last level appear as far left as possible.

PART - B

  1. Explain the tree traversal techniques with an example.
  2. Explain binary search tree in detail.
  3. Construct an expression tree for the expression (a+b*c) + ((d*e+f)*g). Give the outputs when you apply inorder, preorder and postorder traversals.
  4. How to insert an element into a binary search tree and write down the code for the insertion routine with an example.
  5. How to remove an element from binary search tree and its algorithm with example.
  6. Explain the concept of threaded binary tree with example.
  7. What are threaded binary tree? Write an algorithm for inserting a node in a threaded binary tree.
  8. Create a binary search tree for the following numbers start from an empty binary search tree. 45,26,10,60,70,30,40 Delete keys 10,60 and 45 one after the other and show the trees at each stage.
  9. What are the different storage representations for a binary tree? Explain with example.


EC2314 Digital Signal Processing Question Bank

Anna University

Department of Electrical and Electronics

Engineering

EC2314 - Digital Signal Processing

University Question Bank


Unit 1

Part A

April May - 2010

1. Determine the energy of the discrete time sequence x(n) = { 1, 2+j2,2,2-2j}

2. Check whether the system characterized by the equation image is linear or not.

May June - 2011

3. Determine the energy sequence image

4. State sampling theorem

Nov Dec – 2011

5. Define causal theorem

6. State sampling theorem

May June 2012

7. Define aliasing and Nyquist rate

8. Test the system y (n) = n2x (n) for the time invariance

May June 2013

9. What is power signal?

10. Check if the systemimage is linear

Part B

April May – 2010

1. Explain the following with respect to discrete-time system:

(i) Causality

(ii) Linearity

(iii) Stability

(iv) Shift-invariant

2. Explain what is quantization?

3. Explain sampling theorem for band pass signals.

4. Determine the Nyquist sampling rate for the following signal:

image

5. Explain about analog-to-digital conversion

May June – 2011

6. Check the linearity, time invariance, causality and stability for the systems described by

image

7. State and prove sampling theorem

Nov Dec – 2011

8. Determine which of the following are periodic signals and hence find their period. x1(n) = exp(-0.1 ∏ n)

x2(n) = sin(n ∏ / 4) + sin(n ∏ / 7)

x3(n) = exp(j0.2 ∏n + ∏/2)

x4(n) = U(n) + U(n - 2) - U(n - 4)

9. State and prove Low Pass Sampling Theorem with neat spectra.

May June 2012

10. Explain how sampling can be done with an impulse function. Draw the spectrum of the sampled signal and explain aliasing.

11. Explain the process of reconstruction of the signal from its samples. Obtain the impulse response of an ideal reconstruction filter.

12. Verify and explain whether the following impulse responses describe causal, stable or LTI systems.

May June 2013

13. Explain the time invariant property of systems and find if the system y[n) = x(n)+x(n -1) is time invariant, linear and causal.

14. State the stability property of LTI systems and check if the system defined by y(n) = x(n) + nx(n +1) is stable, linear and causal.

15. Explain the Nyquist sampling theorem and the effect on the signal at different sampling rates.

16. Explain the process of quantization during analog to digital conversion and errors associated with it.


Unit 2

Part A

April May - 2010

1. State the initial value theorem of z-transform

2. Define discrete Fourier series representation of a periodic sequence

May June - 2011

3. Find the final value of x(n) if image

4. Find the fourier transform of image

Nov Dec – 2011

5. Define stability of a discrete time system in 2-domain

6. Define transfer function

May June 2012

7. What is the relation between fourier transform and Z transform?

8. What is Dirchlet’s condition?

May June 2013

9. What is the inverse Z transform of 1?

10. Mention two properties of ROC of Z transform.

Part B

April May – 2010

1. Explain the properties of ROC of Z transform

2. Using Z transform find the impulse response of the system described by the difference equation: y(n)-(3/4)y(n-1)+(1/8)y(n-2) = x(n)

3. Find the frequency response of the system with difference equation y(n) + (1/2)y(n-1) = x(n) – x(n-1)

4. ) Find the linear convolution of x(n) = {1,-3,5,-7,9} with h(n) = {8,10,12,14}.

May June – 2011

5. Find the Z-transform of image and also write the ROC.

6. Find the inverse Z transform of image for the ROC Z>0.5

7. Find y(n0 if y(n)-(3/4)y(n-1)+(1/8)y(n-2) = (0.25)n for n>0. The initial conditions are y(-1) = 4 and Y(-2) = 10.

Nov Dec – 2011

8. State the Convolution Property of Z Transform and prove the same.

9. Find the inverse Z Transform of X{Z) = ZI(Z – 1)2

10. A discrete time LTI system y(n - 2) + 0.8y(n -1) + 0,15y(n - 2) = 2x(n). Determine (a) The System function (b) Impulse response (c) Frequency response (d) Whether the system is causal and/or stable.

May June 2012

11. using the residue method, find the Inverse Z Transform of x(z) = 1/(z-0.25)(z-0.5), ROC:Z>0.5

12. Determine the Fourier Transform of the signal image

May June 2013

13. Find the Z transform of the signal x(n) = (l / 3)n-1 u(n -1).

14. Find the poles of the system and determine if the system is stable.


Unit 3

Part A

April May – 2010

1. Find the 4-point DFT of x(n) = {1,-1,0,1}

2. What is meant by “inplace-computation” in FFT algorithm?

May June – 2011

3. Distinguish circular shifting and shifting in DFT.

4. Compare the number of complex multiplications required for direct calculation and

FFT evolution of N – point DFT if N = 1024.

Nov Dec – 2011

5. What is meant by bit reversed indexing?

6. Determine the number of multiplication required in finding 64-point DFT using

Radix-2 FFT algorithm.

May June 2012

7. What is bin spacing?

8. Compute the DFT of the sequence x(n) = (-1)n for the period N = 16

May June 2013

9. What is meant by radix 2 FFT?

10. Define circular convolution

Part B

April May – 2010

1. Derive the decimation-in-frequency radix-2 FFT algorithm for evaluating DFT of the discrete-time sequence and draw flow graph for 8-point DFT computation.

2. Using FFT algorithm find the inverse DFT of

image

May June – 2011

3. Find the 8 point DFT of the following sequence using DIT (decimation in time) FFT algorithm

x(n) a {1.-1,-1,-14,1.1,-1}.

4. State and prove the circular frequency shift and circular time shift properties of DFT.

5. Explain the calculation of inverse DFT using FFT algorithm.

Nov Dec – 2011

6. A discrete time LTI system y(n - 2) + 0.8y(n -1) + 0,15y(n - 2) = 2x(n). Determine (a) The System function (b) Impulse response (c) Frequency response (d) Whether the system is causal and/or stable.

7. State and prove any four properties of DFT

8. Find 8 point DFT of given sequence x(n) = {1,2,3,4} using radix-2 DIT-FFT

May June 2012

9. State and prove circular convolution

10. Determine the DFT (8-point) for a continuous time signal, x(t)=sin(2∏ft) with f=50Hz.

11. Determine the response of LTI system by radix-2 FFT. The input sequence is given by x(n) = {-1, 1, 2, 1, -1} and impulse response is h (n) = {-1, 1,-1,1}

May June 2013

12. Explain the important features of Decimation in frequency FFT algorithm.

13. Obtain the DFT of x(n) = {1, 2, 3, 4, 4, 3, 2, 1} using Decimation in time FFT algorithm.

14. Compute the N point DFT of x{n) = an u(n) for cases |a| < 1 and |a| = 1.

15. State and prove the circular time shift property of DFT


Unit 4

Part A

April May – 2010

1. What are the properties of FIR filters?

2. What is bilinear transformation?

May June – 2011

3. What is the main objective of impulse invariant transformation?

4. What is meant by frequency warping?

Nov Dec – 2011

5. Define linear phase shift filter

6. Mention the advantage of Bilinear Transformation.

May June 2012

7. What is frequency warping?

8. Define phase delay and group delay

May June 2013

9. What is the advantage of bilinear transformation?

10. Write the general form of difference equation of a FIR filter.

Part B

April May – 2010

1. Explain the desirable characteristics of the window function.

2. Draw the Cascade realization using minimum number of multipliers for the system

clip_image016

3. Design a low pass FIR filter of order 7 with cut off frequency ∏/3 rad/sec using Hanning window

4. Design a digital Chebyshev filter to meet the constraints :

clip_image018

by using bilinear transformation with sampling Period T = 1 sec.

May June – 2011

5. Design and realize a digital low pass filter using the bilinear transforms method to satisfy the following characteristics:

  • Monotonic stop band and pass band
  • 3.01 dB cutoff frequency of 0.5 ∏ rad
  • Magnitude down at least 15 dB at 0.75∏r rad.

6. Obtain a parallel realization for the following

clip_image022

Use direct form II realization for each section

7. Explain the different windows used in FIR filter design.

Nov Dec – 2011

8. Design a FIR Filter for the following

clip_image024

in the band 0 to ∏. Use hamming window.

9. Convert the following analog filter into digital using IIM method.

H(S) = IS2 /(S2 + 0.3S+0.02)

10. Compare Butterworth and Chebyshev approximations

May June 2012

11. Design and realize a low pass filter using a rectangular window by taking 9 samples of w(n) and with a cutoff frequency of 1.2 rad/sec.

12. Design a Butterworth low pass digital filter satisfying the following conditions using bilinear transformation

clip_image026

May June 2013

13. Explain the properties of Chebychev filters.

14. Find the order N and the transfer function of analog Chebychev low pass filter for the following specification: Pass band ripple 3 dB and pass band cut off frequency 1 KHz, stop band attenuation of 16 dB at stop band frequency of 2 KHz.

15. Mention the characteristic features of FIR filters

16. Design a FIR filter with

clip_image028

Using Hanning window and N = 7


Unit 5

Part A

April May – 2010

1. What is pipelining?

2. What is meant by limit cycle oscillations?

May June – 2011

3. Define limit cycle

4. Write about the accumulators in TMS 320C54X.

Nov Dec – 2011

5. What is the advantage of Harvard architecture?

6. Define Dead Band

May June 2012

7. What is Dead band of Filter?

8. What is meant by limit cycles?

May June 2013

9. What is product quantization error?

10. What is pipeline depth and what is its value of the TMS320C54X?

Part B

April May – 2010

1. Draw the black diagram of Harvard architecture and explain.

2. Write short notes on :(i) Direct addressing (ii) Memory-mapped register addressing.

3. Explain the different buses and their functions of TMS320C54X processor.

4. Explain quantization effects in FIR filter.

May June – 2011

5. Explain the TMS 320C54X internal hardware with a neat diagram.

6. Explain the errors introduced by quantization with necessary expression

7. Illustrate the impact of quantization of filter coefficients on the poles and zeros with an example.

Nov Dec – 2011

8. Draw the architecture outlines of TMS320C54X processors and explain its features.

9. Write short note on (a) Truncation and rounding (b) Coefficient Quantization.

May June 2012

10. With a neat block diagram explain the architecture of TMS320C54X

11. Study the limit cycle behavior of the system descr ibed by w(n)=Q[aw(n—l)]+x(n) where w(n) is the output of the filter and Q[.] is quantization. Assume that a = 7/8, x(0)=3/4 and x(n)= 0 for n> 0.

May June 2013

12. Describe the architecture of TMS320C54X and explain the functions of the control arithmetic logic unit, parallel arithmetic logic unit and various registers in it.

13. Explain zero input limit cycle oscillations.

14. Explain the output noise due to A/D conversion of the input x (n).